Re-edit RAW from rendered JPEG/TIFF
When you render a JPEG/TIFF and check the option to "Include Photo Ninja settings", the editor settings are embedded in XMP inside the rendered image. You can use the "Edit Original" command to re-open the RAW file and apply the settings from the JPEG/TIFF. This provides a simple and effective way to manage multiple edits of the same RAW file.
JPEG/TIFF images that have these "linked" settings are tagged with a diamond indicator in the lower right corner of the thumbnail:
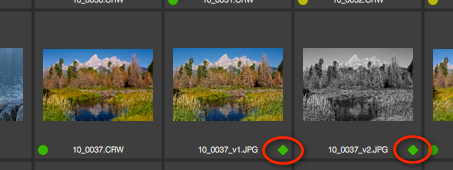
In this example, there are two rendered JPEGs with linked settings -- one with a color rendering, and another with a black-and-white rendering. The settings link to the raw file (10_0037.CRW in this case).
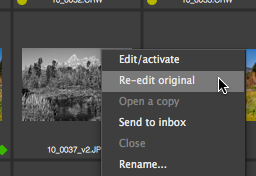
To re-edit the raw, right-click on an image that has linked settings and choose "Re-edit original...":
The RAW file will be opened, and the settings that were embedded in the JPEG will be applied. In addition, the Render dialog will be pre-initialized with the file name, folder, and rendering settings used to create the JPEG, so you can easily re-render the JPEG after you make any changes to the settings.
NOTE: The raw file must be located in the same folder as the JPEG/TIFF. If you rename the raw file, the link to the JPEG/TIFF will be broken.
NOTE: On the "File Handling" page of the Photo Ninja preferences dialog, there is an option to "Invoke 're-edit original' when double-clicking on a JPEG/TIFF with linked settings". By default, this option is disabled, and double-clicking will open the JPEG/TIFF. If you enable the option, you can open a JPEG/TIFF by right-clicking and choosing "Open/Activate".